
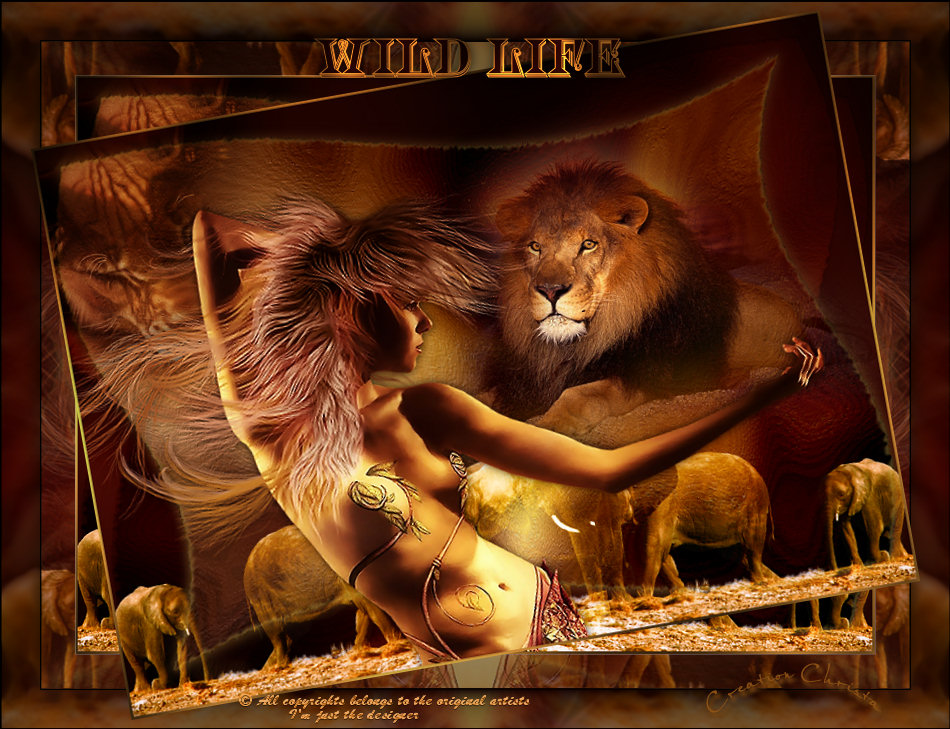
© by Christa 29.08.2011
English 
This tutorial was written and designed by me © Christa
The © copyright for this tutorial belongs to me alone
The © for the translation belongs to me and Petra

This tutorial may neither be copied, nor offered for download at any other site
The © copyright for the material belongs to each individual artists.
Each of the tutorial, my tinkering has even pay attention to copyright.
My tutorials are intended as a suggestion.
Should I have, unknowingly, violated any copyright, I ask that you notify me via Email
My thanks for the lovely material, for without it these pictures would not be possible
thank you Nikita for the wonderful Tubes
Link for Wildlife Tubes
© All copyrights belongs to the original artists
I'm just the designer
This tutorial was written with PSP 9
Print Icon - Print Page


thank you all my tester from my Tutorials
************************************************************
Mein Material 
Xero Improver
Nik Color Efex Pro 3.1
Graphics Plus Cross Shadow
AAA Filters Foto Frame
Simple - 4 Way Average
**********************************************************
 |
You may take this little figure
along for your orientation |
|
**********************************************************

A word to all of you
All the discription for my Tutorials are "How I create my Image"
For your Tubes and Colors you maybe change the settings -
If you use my Elements - you have to colorize
I do not write this anymore at the Tutorial
Lets start

Step: 1
New Canvas 900 x 650 px transparent
light FG Color #e89d3e
dark BG Color #300703
fill Canvas with BG Color
Plugin Graphics Plus Cross Shadow ( Default 128/128)

Step: 2
Open my material minimize - open 1228507035_feerie.psd
Copy the Layer "calque" paste as new Layer
Deformingtool - Pull to the top and to the bottom till the border
Layer duplicate - Image - Mirror
Arrange - send Layer down - Blend Mode - Soft Light
Drop Shadow 0/0/55/15,00 FG Color
adjust to both Layers

Step: 3
Copy the ferrietube - paste as new Layer - Image - Resize
115 % all Layer not chequed
Arrange to the bottom till the border - Repeat the Drop Shadow with black
Plugin - Xero Improver 10/10/10
Layer - Duplicate - Blend Mode - Soft Light
Copy the Tube " 12286689901_animaux.psd
paste as new Layer - Arrange - Send Layer to the top
Arrange the Tube to the right - see my image
Arrange the Layer below both Tubelayers
Copy "12926130897_animaux_nikita.psd
paste as new Layer - Arrange to the top and to the left - Blend Mode
Soft Light - Layer duplicate

Step: 4
Copy the Tube with the elephants - paste as new Layer
Image - Resize 75 % - all Layers not chequed
Arrange to the right and to the bottom till the border
Plugin Nik Color Efex Pro - Bi-color User Defined
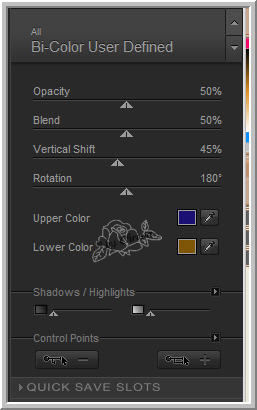
Duplicate - Image - Mirror - both Layer Blend Mode - Screen
Merge all Layer

Step: 5
Image - Add Borders 3 px FG Color
Magic Wand - select the border - repeat Graphics Plus Cross Shadow
Selection - Invert
Drop Shadow with Black - Selection - None
Edit - Copy
Image - Resize to 800 x 579 px all Layers chequed
Sharpen
Image - Add Border - 75 px BG Color
Magic Wand - select the Border
New Raster Layer - paste into a Selection - Selection - None
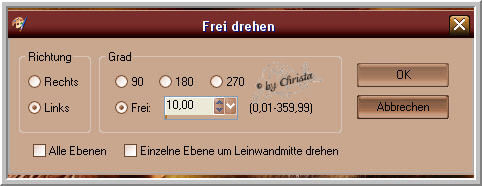
Edit - Paste as new Layer
Image -Rotation - Free Rotation

Step: 6
Layer Raster 1 (Border) is activ
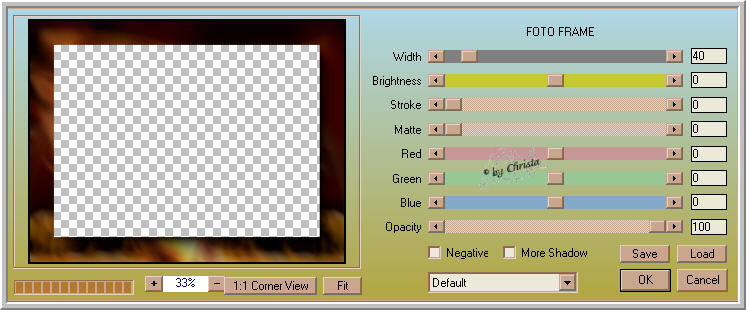
Plugin AAA Frames - Foto Frame
Plugin Simple 4 Way Average
Weite your Text or copy mine
Paste as new Layer
Adjust the Dropshadow for your own Text
Paste your Watermark as new Layer
Merge all Layer
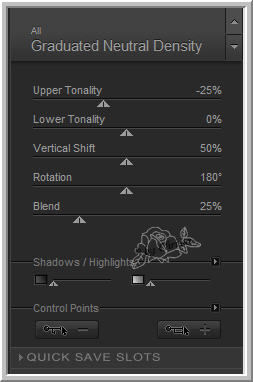
Adjust Plugin Nik Color Efex Pro as you ike it
My Values like this
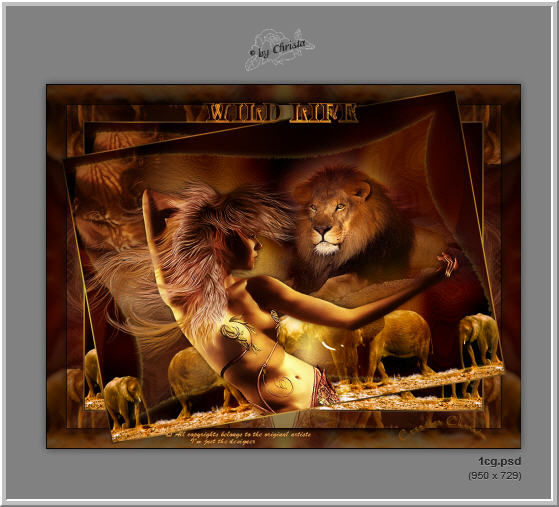
Save as JPG

If you like to send your Image to me -
add save image_your Name_Tutorialname
Send to : Mail
|
I hope you enjoyed the tutorial

Sincerely Christa
