

© by Christa 20.08.2011
English 
This tutorial was written and designed by me © Christa
The © copyright for this tutorial belongs to me alone
The © for the translation belongs to me and Petra

This tutorial may neither be copied, nor offered for download at any other site
The © copyright for the material belongs to each individual artists.
Each of the tutorial, my tinkering has even pay attention to copyright.
My tutorials are intended as a suggestion.
Should I have, unknowingly, violated any copyright, I ask that you notify me via Mail
cg@silvercurlyart.de
My thanks for the lovely material, for without it these pictures would not be possible
thank you HeidiDesign  , Lizztish
Chaosgaby my Exclusiv Tuberin
Maske Sigrid
© All copyrights belongs to the original artists
I'm just the designer
This tutorial was written with PSP 9
Print Icon - Print Page


thank you all my tester from my Tutorials
************************************************************
My Material 
Graphics Plus Cross Shadow
FM Tile Tools - Collage Circular
Nik Software - Color Efex Pro 3.0 : HIER
Mask into Mask Folder to psp
**********************************************************
|
You may take this little figure
along for your orientation |
|
**********************************************************

A word to all of you
All the discription for my Tutorials are "How I create my Image"
For your Tubes and Colors you maybe change the settings -
If you use my Elements - you have to colorize
I do not write this anymore at the Tutorial
Lets start
Step: 1
New Canvas 900 x 650px transparent
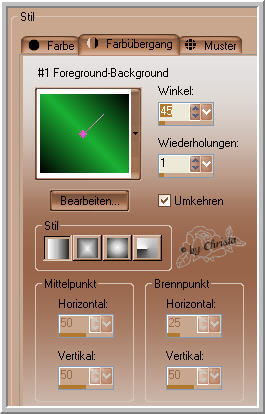
light FG Color #16b434
BG Color Black
Fill Canvas with Black
New Layer fill with this Gradient
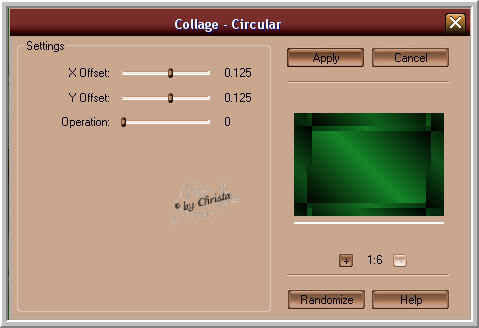
Plugin FM Tile Tools - Collage - Circular
Step : 2
Layer 2 Image -Resize to 90 % all Layers not chequed
Effects -Edgeeffects -Enhance
Copy your Tube for the Background - mine naturehsk-2011-57.psd
paste as new Layer
Blend Mode - Hard Light
Layer merge down
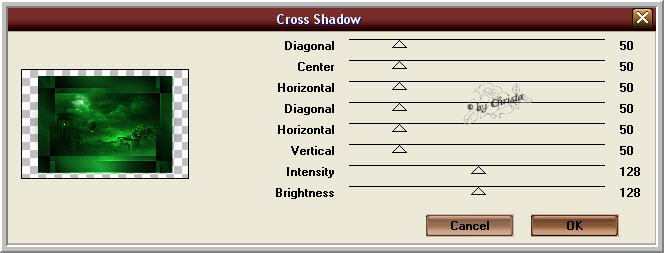
Plugin Graphics Plus Cross Shadow
Step: 3
New Raster Layer fill with Gradient - Selection - All
Open paper.psd - Copy - Close
New Raster Layer
Edit - paste into a Selection - Blend Mode - Soft Light
Selection -None - Layer - merge down
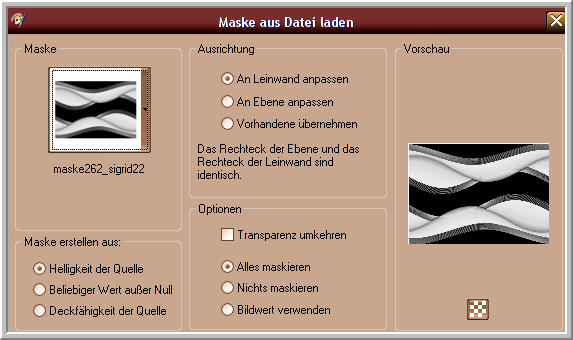
Layer - Load Mask from Disk
Merge group - repeat Cross Shadow
Drop Shadow 0 / 0 / 45 / 6,00 Black
Layer duplicate
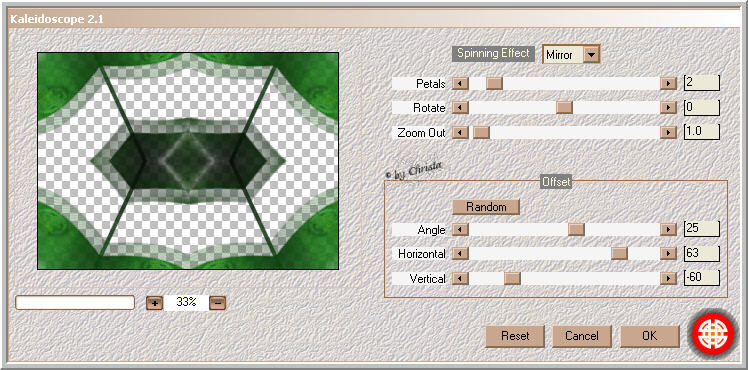
Plugin Mehdi Kaleidoscope 2.1
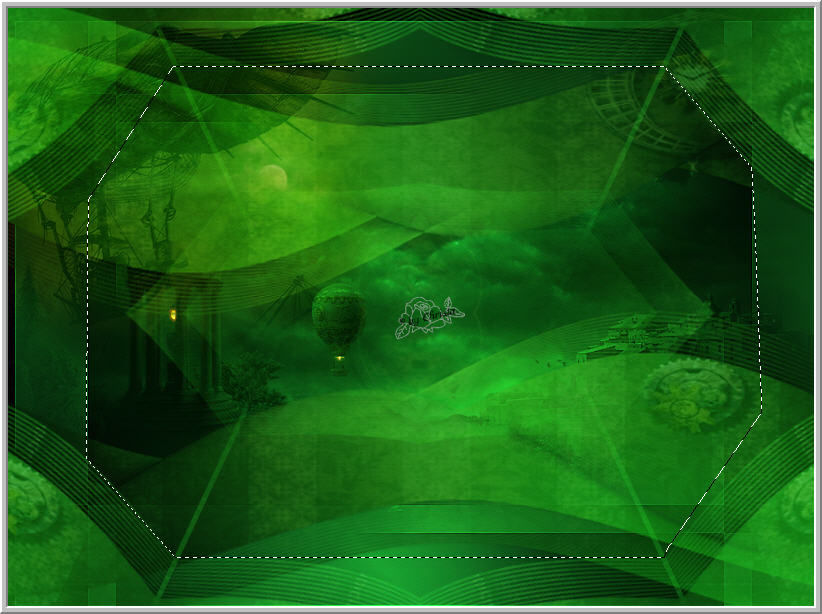
Selectiontool - Point to Point
select the part at the middle - Delete - Selection - None
Repeat Graphics Plus Cross Shadow
Step: 4
Coopy the Tube " lizztish_fantasy-land5.psd
paste as new Layer - Arrange to the left and to the top - Layer colorize
For me H: 93 + S :199
Layer - Blend Mode - Hard Light
Copy the Tube chg.7.150982011.psd (Femme Tube)
Paste as new Layer - Arrange the Tube as you like it
I duplicated mine - Blend Mode -Soft Light
to both Tubes - Sharpen
Copy "chg.1926042011.psd - paste as new Layer
Arrange to the right - Blend Mode -Soft Light
Sharpen
Copy "chg.3.26042011.psd - paste as new Layer
Sharpen
Step: 5
Merge all - Copy
Image -Canvassize - with BG Color

Magic Wand - click into the black Border
Eidt - paste into a Selection -
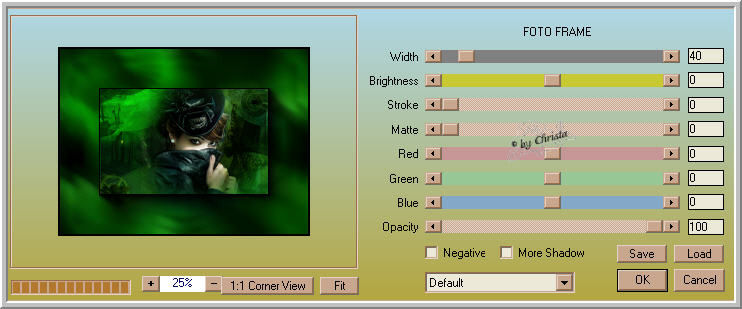
Plugin AAA Frames - Foto Frame
Repeat the Drop Shadow - Selection - NOne
Step: 6
Paste your Text as new Layer
My Font

Repeat the Drop Shadow
Watermark as new Layer
Merge all
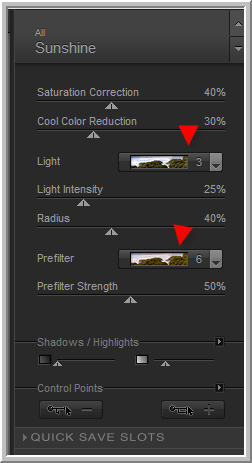
Plugin Nik Software - Color Efex Pro
Its up to you how do you like your Image
For me Sunshine
Save as JPG
I hope you enjoyed the tutorial
Sincerely Christa
