
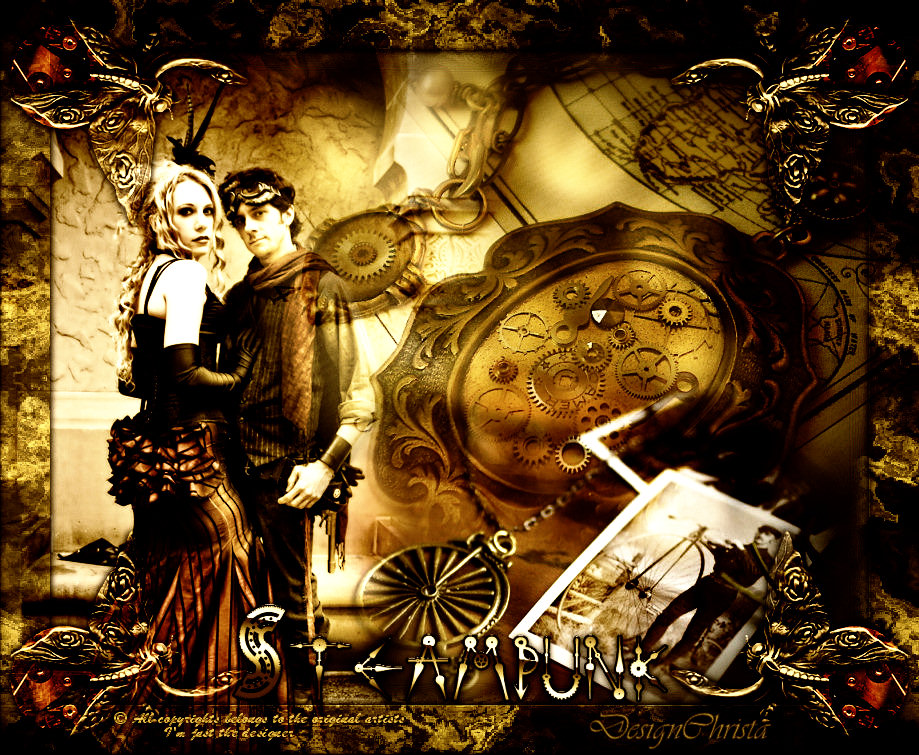
© by Christa 18.08.2011
English 
This tutorial was written and designed by me © Christa
The © copyright for this tutorial belongs to me alone
The © for the translation belongs to me and Petra

This tutorial may neither be copied, nor offered for download at any other site
The material offered comes from tube exchange groups, or tube sites from the web
The © copyright for the material belongs to each individual designer
Should I have, unknowingly, violated any copyright, I ask that you notify me via
cg@silvercurlyart.de
My thanks for the lovely material, for without it these pictures would not be possible
thank you Chaosgaby for the Exclusiv Tubes for me....
© All copyrights belongs to the original artists
I'm just the designer
This tutorial was written with PSP 9
Print Icon - Print Page


thank you all my tester from my Tutorials
Bilder meiner lieben Tester
************************************************************

Unlimited 2.0
Bkg Designer sf10 III - Radial Tile 01 : Hier
Background Designer IV - Random Smelter : Hier
beide Filter in ( in Unlimited importieren )
Simple Filter
Nik Color Efex Pro 3.1
**********************************************************
 |
You may take this little figure
along for your orientation |
|
**********************************************************

A word to all of you
All the discription for my Tutorials are "How I create my Image"
For your Tubes and Colors you maybe change the settings -
If you use my Elements - you have to colorize
I do not write this anymore at the Tutorial
Lets start

Step: 1
Open my material at PSP - minimize
Open the JPG Image or your own - Stempunk.jpg - duplicate - with Shift + D
close Original....
Layer duplicate - Layer became invisible - Originallayer is activ
Plugin
Unlimited 2.0
Bkg Designer sf10III - Radial Tile 01
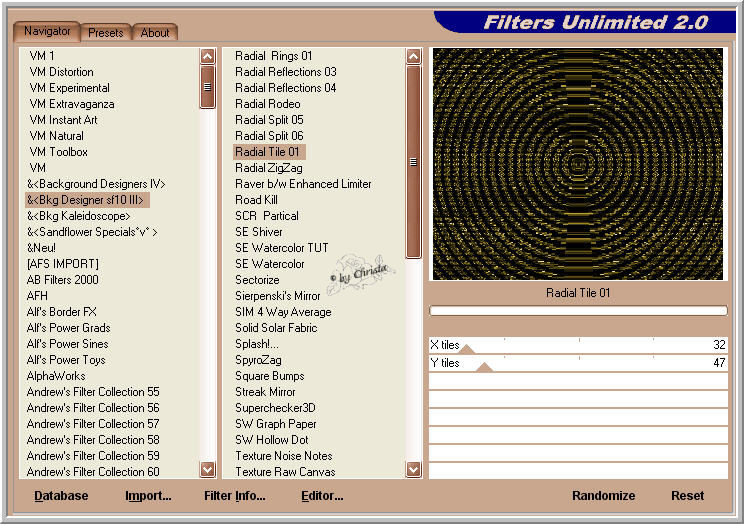
Duplicated Layer became visible again - Layer is activ
Blend Mode - Screen - Duplicate
Layer - Merge visible - Copy

Step: 2
Image - Canvassize
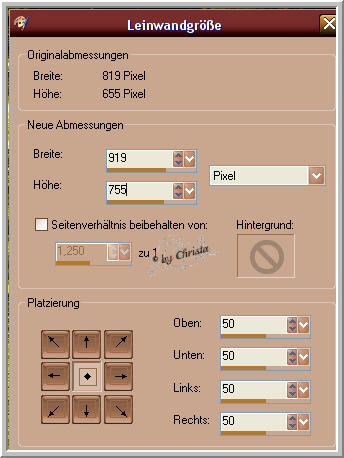
New Raster Layer - arrange - send Layer down - Selection - All
Edit - paste into a Selection - Selection -None
Adjust - Blur - Gaussian Blur - 10,00
Adjust Filter Unlimited 2.0 Background Designer IV - Random Smelter
2 times
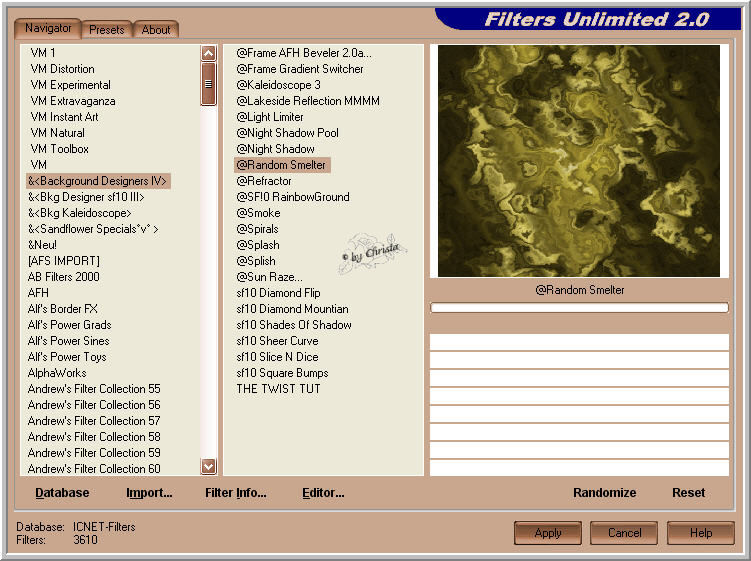
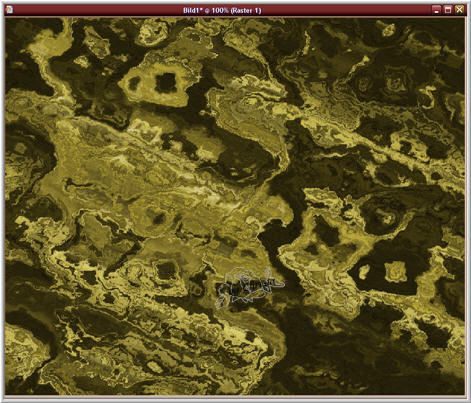
Your Image has to look like this

Step: 3
Merged Layer is activ - Magic Wand - Tolerance and Feather 0
click next to the Image - Layer 1 is activ
Copy - New Raster Layer - Arrange - Send Layer to the top
Paste into a Selection
Filter Simple - 4 Way Average
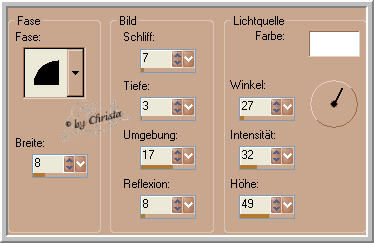
Effects - 3 D Effects - Inner Bevel
Selection - None - Drop Shadow 0/0/85/12,00 Black
Merged Layer is activ
Blur Gaussian Blur 10,00
Effects - Edgeeffects - Enhance more

Step: 4
Copy and paste one after the other your Tubes - arrange as you like it
My first Tube chg.18.15062011.psd - I resize to 80 %
Arrange to the right and to the top - Opacity to 80 %
Blend Mode -Hard Light
My second Tube - chg.28.15052011.psd - I arrange tot he left side
Arrange - Send Layer down - Blend Mode - Hard Light
My 3. Tube - chg.21.150502011.psd - I arrange to the right and to the bottom
Arrange bleow the Borderlayer
Blend Mode - Hard Light
Activ the Layer with the left Tube
Erasertool - big Values

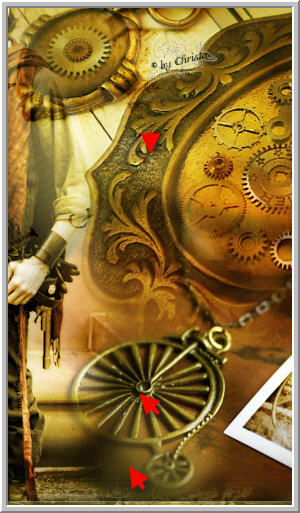
Erase the mared Space very carefully
Your Image has to look like this after the erasing

Step: 5
Borderlayer is activ - Blend Mode - Hard Light
Copy "metalbutterfly-png - paste as new Layer
Arrange - to the bottom and to the right - Repeat the Drop Shadow
Duplicate and Mirror till all Corners are filled
Merge down 3 times
Blend Mode - Hard Light
Copy the Text - paste as new Layer - I resize mine to 80 %
Arrange to the bottom - Repeat the Drop Shadow
paste your Watermark as new Layer
Merge all Layer
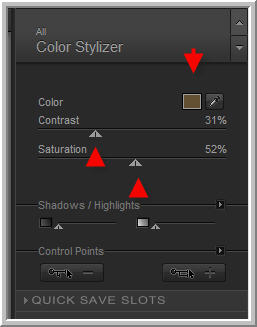
Plugin Nik Color Efex Pro - its up to you how you like your Image
For me
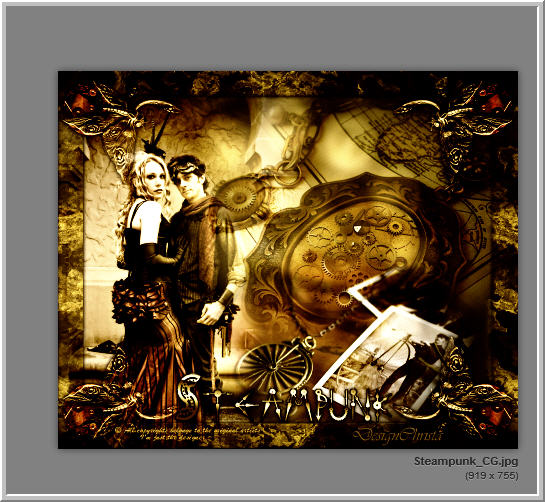
Save as JPG
I hope you enjoyed the tutorial
Sincerely Christa
