© by Christa 31.07.2011
English 
This tutorial was written and designed by me © Christa
The © copyright for this tutorial belongs to me alone
The © for the translation belongs to me and Petra

This tutorial may neither be copied, nor offered for download at any other site
The © copyright for the material belongs to each individual designer
Should I have, unknowingly, violated any copyright, I ask that you notify me via
cg@silvercurlyart.de
My thanks for the lovely material, for without it these pictures would not be possible
thank you PaulinaDesign , Nikita for the Tubes
Mask © ButterflyMask
© All copyrights belongs to the original artists
I'm just the designer
This tutorial was written with PSP 9
Print Icon - Print Page


thank you all my tester from my Tutorials
************************************************************
My Material 
Plugins

Xero Improver
Xero – FRITTLLARY
Graphics Plus Cross Shadow
Unlimited 2.0 – Distort – Radial ZigZag
Unlimited 2.0 – Convolution Filter – Emboss ( light,inverse )
Mask into Mask Folder
**********************************************************
|
You may take this little figure
along for your orientation |
|
**********************************************************
Step :1
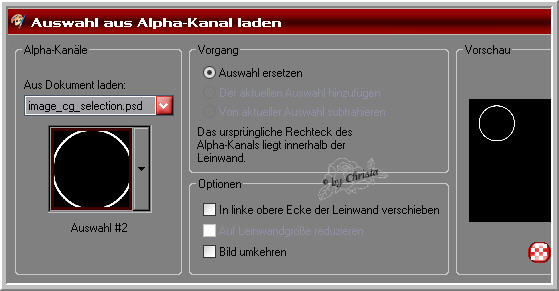
Open image_cg_selection.psd.
Select a FG Color #959495
BG Color White
Please colorize all Elements and the Text to your colors
I do not write this anymore
fill Canvas with FG Color
Fiter Xero - Frittlary
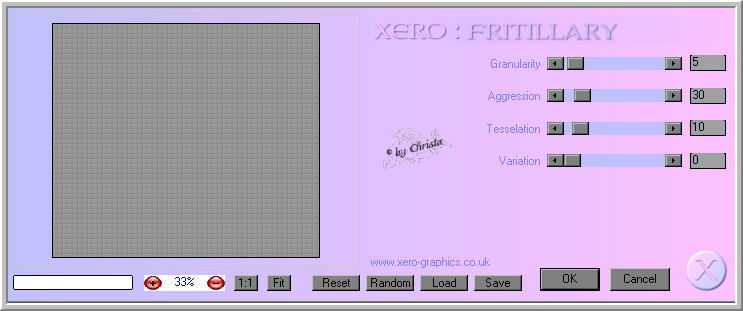
Image - Resize - 80 % all Layers not chequed
Layer duplicate - Filter Unlimeted 2.0 - Distort - RadialZigZag
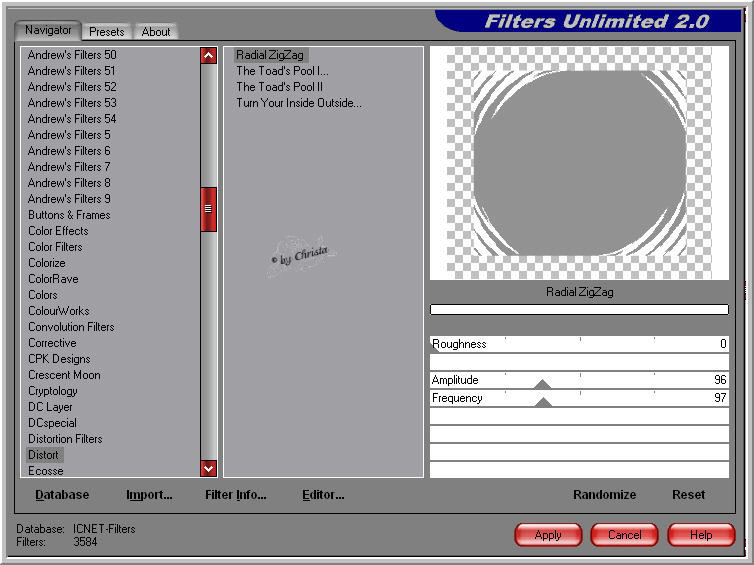
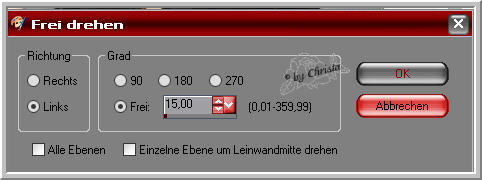
Image - Rotation - Free Rotation
Layer 1 - Repeat Filter distort
Step :2
Adjust to both Layer this Drop Shadow - Repeat the Shadow
0/0/65/8,00 Black
New Raster Layer - Arrange send Layer to the top fill with FG color
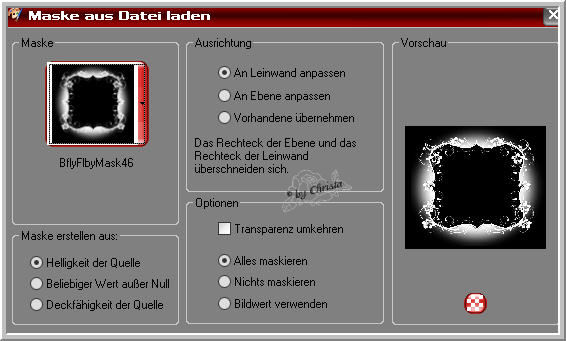
Load Mask from Disk - merge Group
Layer - Duplicate - Originallayer - Mask is activ
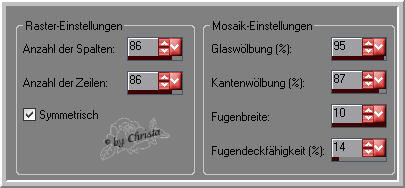
Effects - Texture Effects - Mosaic Glass
Duplicated Mask
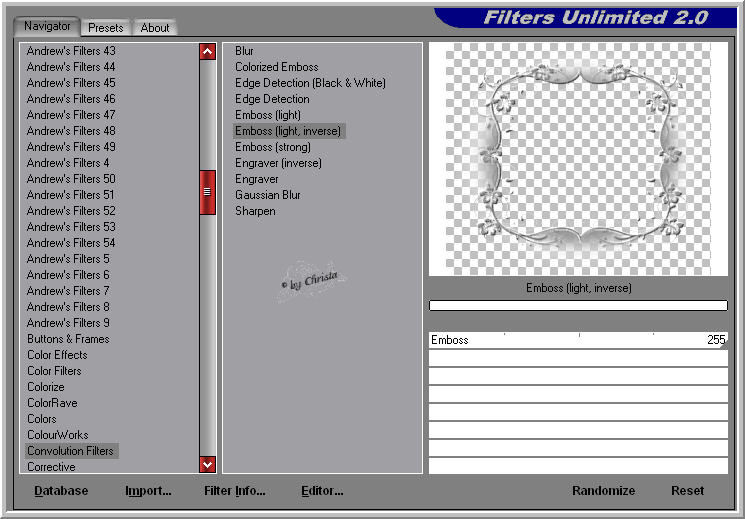
Filter Unlimited 2.0 – Convolution Filter – Emboss ( light,inverse )
Step :3
Open Cluster 3.png - Copy - paste as new Layer
Image - Resize - 75 % all Layers not chequed
Repeat the Plugin Convolution Filters as above
Repeat the Drop Shadow
Activ the Layer Copie of Layer 1
Open the Man Tube - Copy - paste as new Layer
Image - Resize - 80 %
Arrange a little bit to the left
Plugin Xero Improver 10/10/10
Step :4
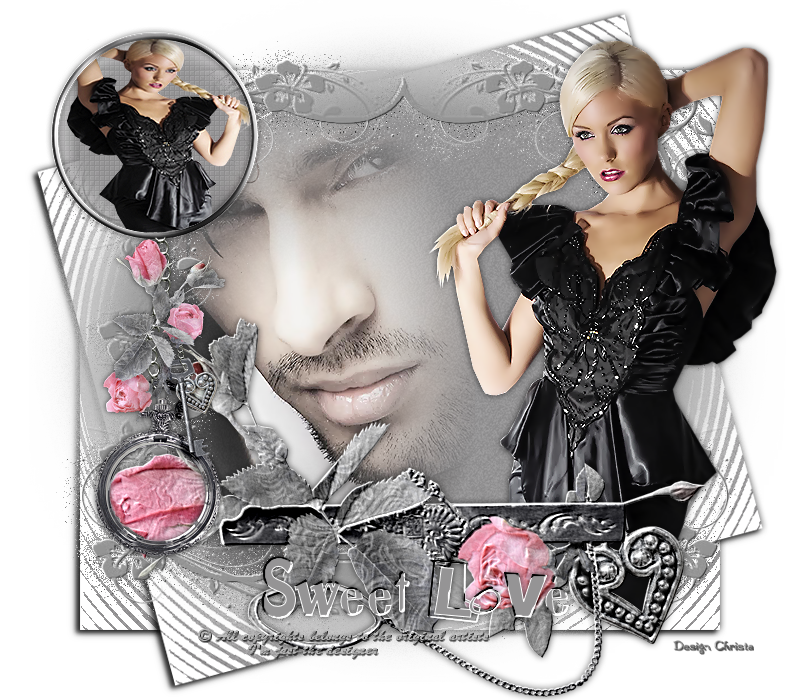
Open the Femme Tube - Copy - paste as new Layer
Arrange Layer on top of the Mask - Tube - arrange to the right side
So that a part of the skirt in visible into the heart
Erasertool - medium Values (35) erase the part between Heart and Flower

Repeat the Drop Shadow
Repeat Xero Improver
Step :5
Open the Tube again - Image - Mirror
Copy
New Raster Layer
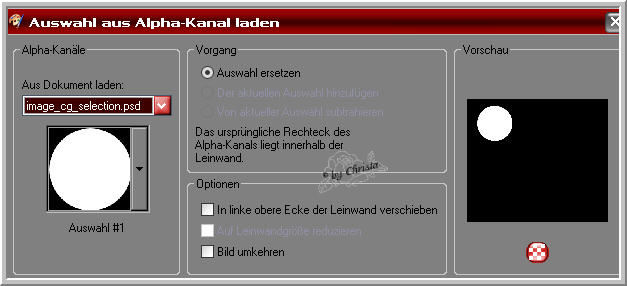
Selection - Load Selection from Alpha - Selection #1
Fill with FG Color
Blur - Gaussian Blur 15
Repeat Plugin Xero Frittllary - Selection - None
Selection - Load from Alpha - Selection #2
New Raster Layer - fill with FG Color
Plugin Graphics Plus - Cross Shadow (Default 128/128)
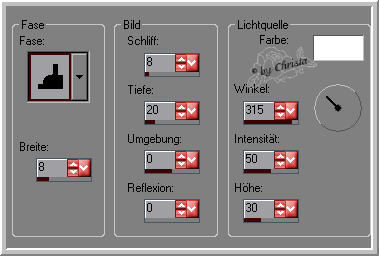
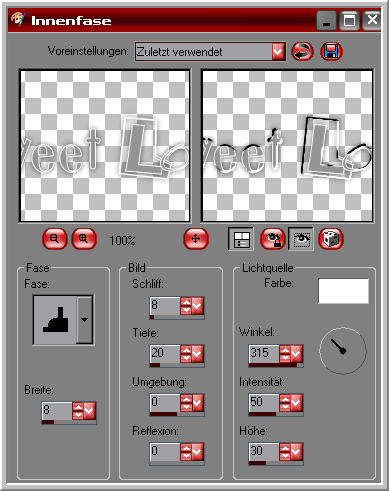
Effects - 3 D Effects - Inner Bevel
Selection - None
Repeat the Drop Shadow
Sharpen
Magic Wand - select the middle of the big Circle
Edit - paste into a Selection - Selection - None
Step :6
Open Cluster 6.png - Copy
paste as new Layer - Image - Resize to 70 % all Layers not chequed
Arrange the Element to the left at the ring
Erase the part of the Chain at the Ring
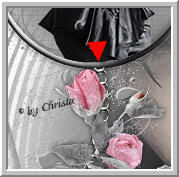
It has to look like this
Write your Text

Adjust the Inner Bevel
Repeat the Drop Shadow
Arrange the Text to the bottom
Paste your Watermark as new Layer
Layer - Merge visible
Spave as PNG
I hope you enjoyed the tutorial
Sincerely Christa