© by Christa 02.03.2011
English
This tutorial was written and designed by me
The © copyright for this tutorial belongs to me alone
The © for the translation belongs to me and Petra

This tutorial may neither be copied, nor offered for download at any other site
The material offered comes from tube exchange groups, or tube sites from the web
The © copyright for the material belongs to each individual designer
Sollte ich unwissentlich ein Copyright verletzt haben , Mail an mich senden.
cg@silvercurlyart.de
thank you Chaosgaby for the Exclusiv Tubes 
thank you Guismo for tubes
Mask © Sharlimar
© All copyrights belongs to the original artists
This tutorial was written with PSP 9
Print Icon - Print Page


thank you all my tester from my Tutorials
************************************************************
My Material 
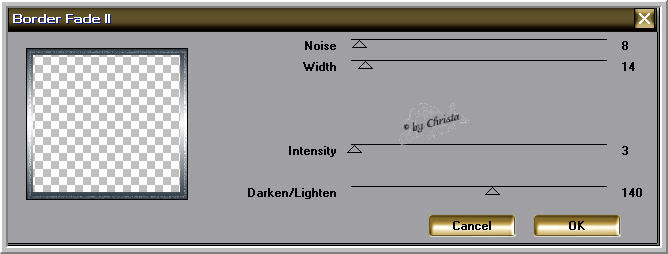
Alf's Border FX - Border Fade II
OptikVerve Labs- virtualPhotographer : HERE
Mask into Mask Folder
**********************************************************
|
You may take this little figure
along for your orientation
|
|
**********************************************************
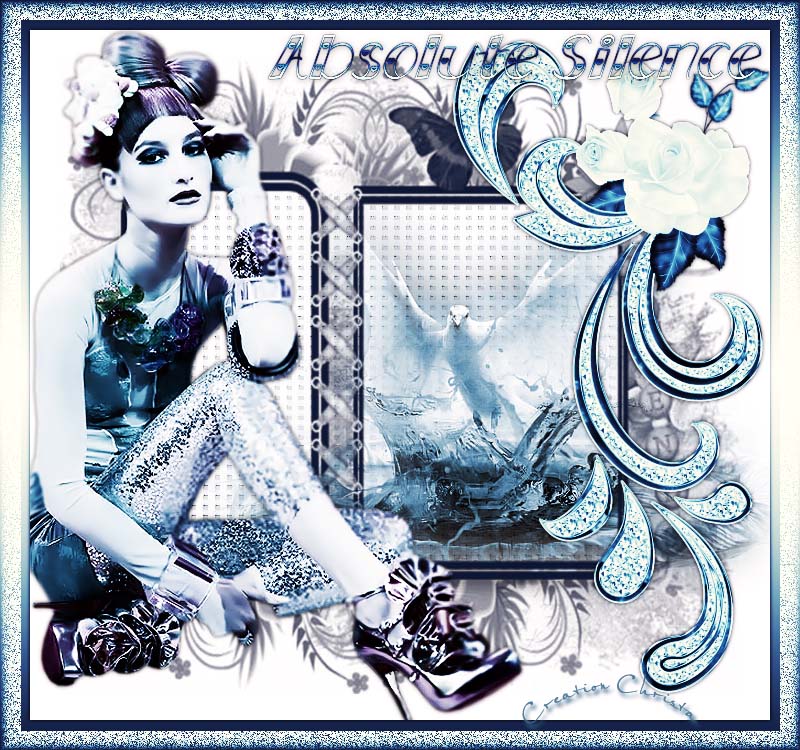
Punkt :1
Step :1
New Canvas 800 x 750 px transparent
VG Color White
BG Color #273741
Fill Layer with FG Color
New Layer fill with BG Color
Layer - Load Mask from Disk - Merge Group
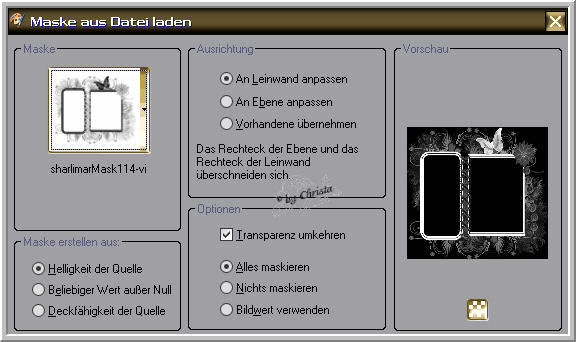
Mask Layer - Resize to 85 % - all Layers not chequed
Drop Shadow 0 / 0 / 85 / 2,00 Black
Step : 2
Copy the Tube " calguismisteddove180111.psd
paste as new Layer
Arrange into the Frame - Send Layer down
Maybe you have to use the Deformingtool a little bit
Duplicate the Tube - Originaltube is activ
Selectiontool - Rectangle
Pull a Selection to the Mask
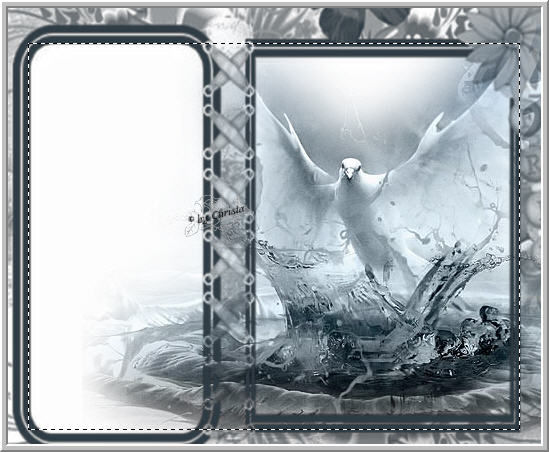
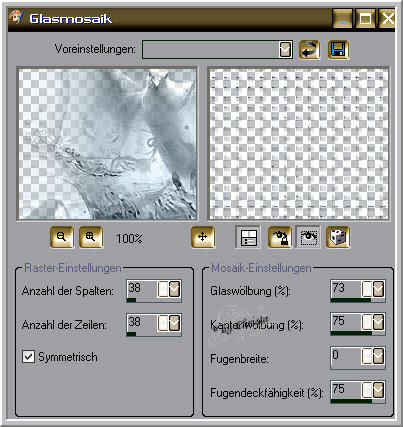
Effects - Texture Effects - Mosaic Glass
Selection - None
Step : 3
Layer 1 is activ - Selection - All - Selection -Modify - contract
to 30 px - Selection - Invert
New Raster Layer - Send Layer to the top
Set this Gradient - fill Selection
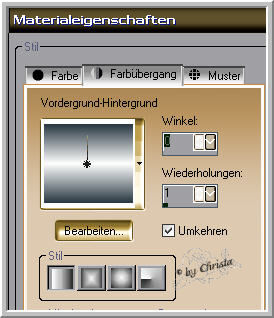
Plugin Alf's Border FX - Border Fade II
Selection - Invert - Drop Shadow 0/0/85/6,00 Black
Selection - None
Step : 4
Copy your Tube -mine chg.16.24022011.psd
paste as new Layer - Arrange the left
Send Layer below the Frame Layer
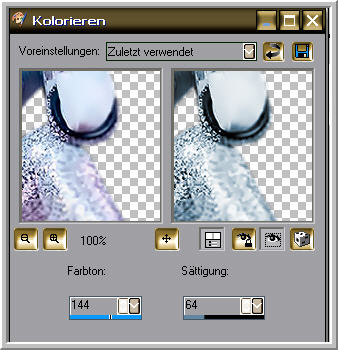
I duplicate the Tube - Originaltube - colorize - for me
Repeat the last Drop Shadow
Duplicated Tube - Blend Mode - Soft Light
Repeat Colorize to the Tube - at the Mask
Copy the Tube "doodle_pinkrose.psd
paste as new Layer - arrange to the rigt
Repeat Colorize - I set the Values at Saturation to 96
Repeat the Drop Shadow
I Colorize the Masklayer with Saturation 233
Paste your Text as new Layer
Watermark as new Layer
Merge all
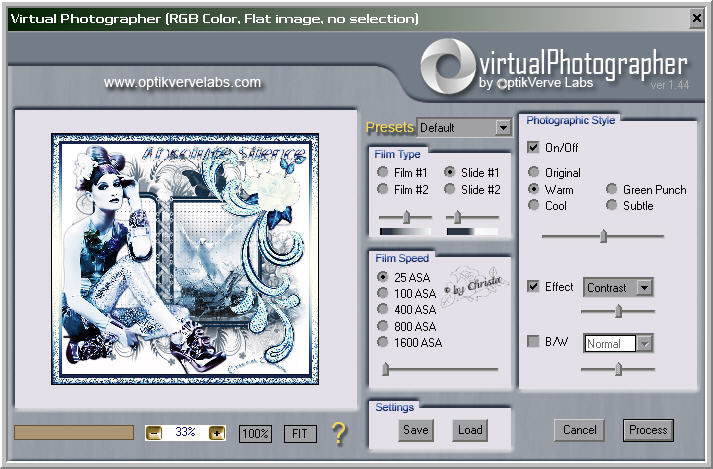
Adjust Plugin OptikVerve Labs- virtualPhotographer
Save as JPG
I hope you enjoyed the tutorial
Sincerely Christa