Illusion
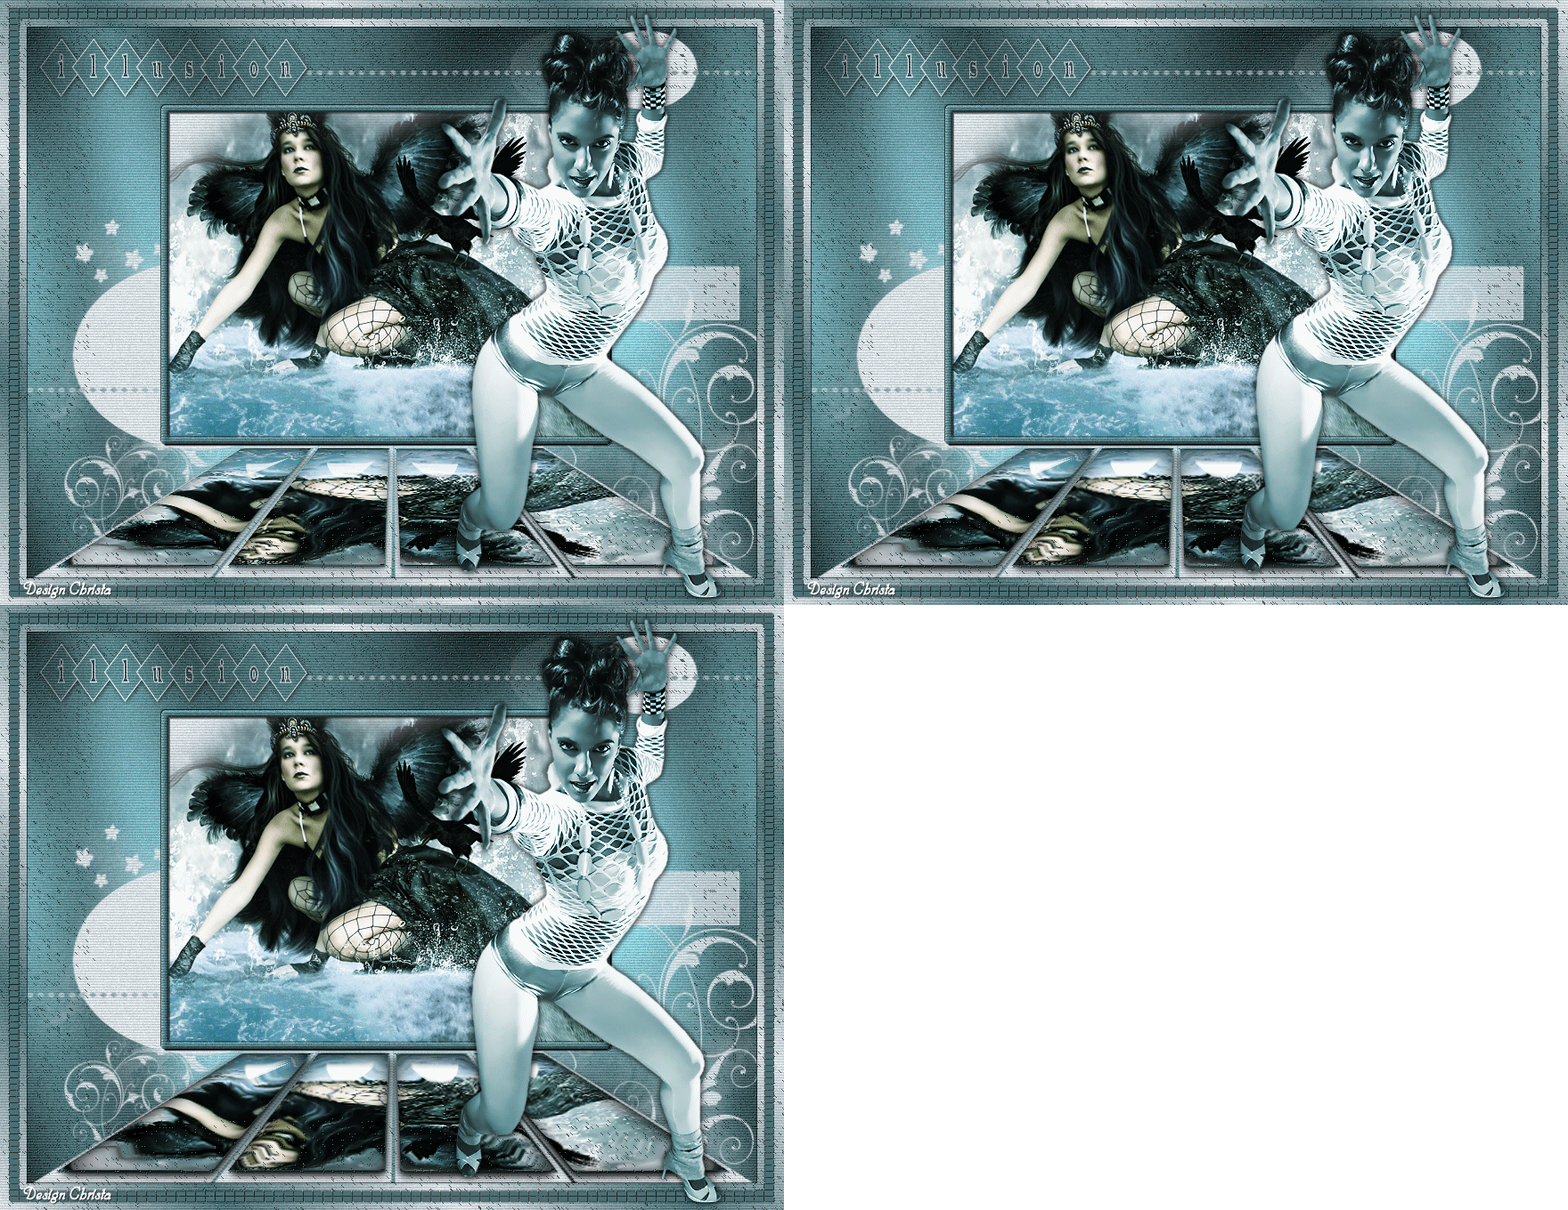
Copyright © SilverCurlyART.   All rights reserved. 16.06.2010
überarbeitet März 2013
This tutorial was written and designed by me
The © copyright for this tutorial belongs to me alone
The © for the translation belongs to me and Petra


This tutorial may neither be copied, nor offered for download at any other site
The material offered comes from tube exchange groups, or tube sites from the web
The © copyright for the material belongs to each individual designer
Should I have, unknowingly, violated any copyright, I ask that you notify me via Email
cg@silvercurlyart.de
My thanks for the lovely material, for without it these pictures would not be possible
thank you DBK Katrina , Leny for the Tubes
Maske Susanne
© All copyrights belongs to the original artists
This tutorial was written with PSP 9
************************************************************
Material 
Plugins
Graphics Plus_Cross Shadow
Photo Effex_Scanlines
Xero Improver
Eye Candy 5 Impact_Glass
Masken in den Maskenordner kopieren
Auswahlen in den Auswahlordner kopieren.
Preset Glass_CG5 into FolderPlugin/Alien Skin\Alien Skin\Eye Candy 5 Impact\Settings\Glass
**********************************************************
 |
Diese kleine Figur zum mitnehmen zur
Orientierung im Tutorial |
|
**********************************************************
Step :1
New Canvas 880 x 680 px transparent
Light FG Color #d7dde3
Dark BG Color #4b7075
Fill Layer fill with BG color
Plugin Graphics Plus_Cross Shadow ( default 128/128)
Plugin Photo Effex Scanlines
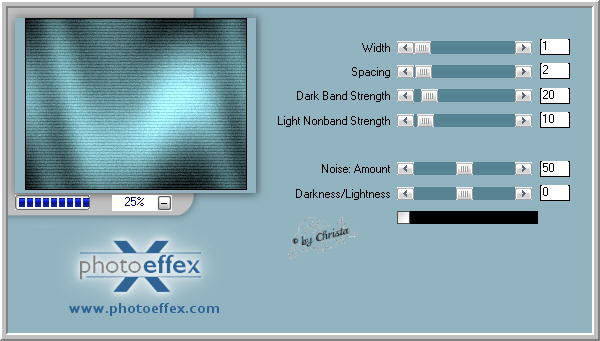
Step :2
Selection - All - Modify - contract to 30 px
Selection - Invert
New Raster Layer - rename into Border 1
Fill with Gradient

Selection - Modify - contract to 10 px
New Raster Layer fill with BG Color - Selection - None
Effects - Texture Effects - Mosaic Anitique
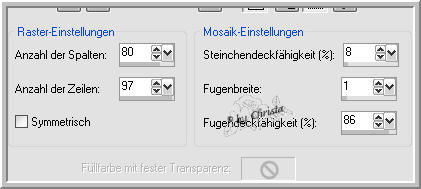
Drop Shadow 1 / 1 / 65 / 1,00 black + negativ values
Activ border 1
Plugin Phot Effex Scanlines
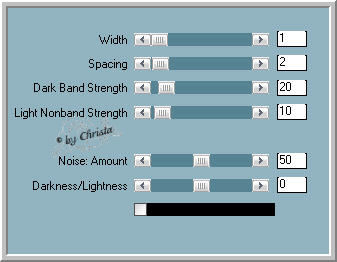
Repeat the Drop Shadow as above
Step :3
Activ your Layer 1 here we go on
New Raster Layer fill with FG Color
Layer - Load Mask from Disk - merge group
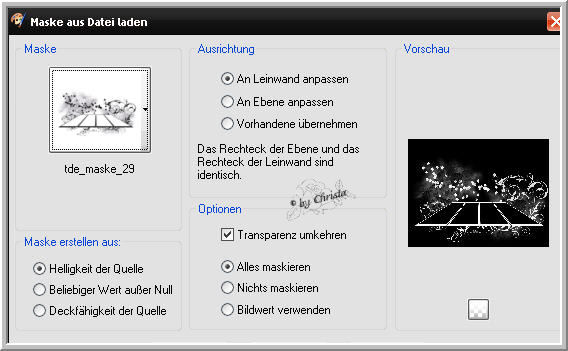
Image - Flip - arrange the Layer now to the top to the border
and to the right to the border
Your mask has to be arranged like this
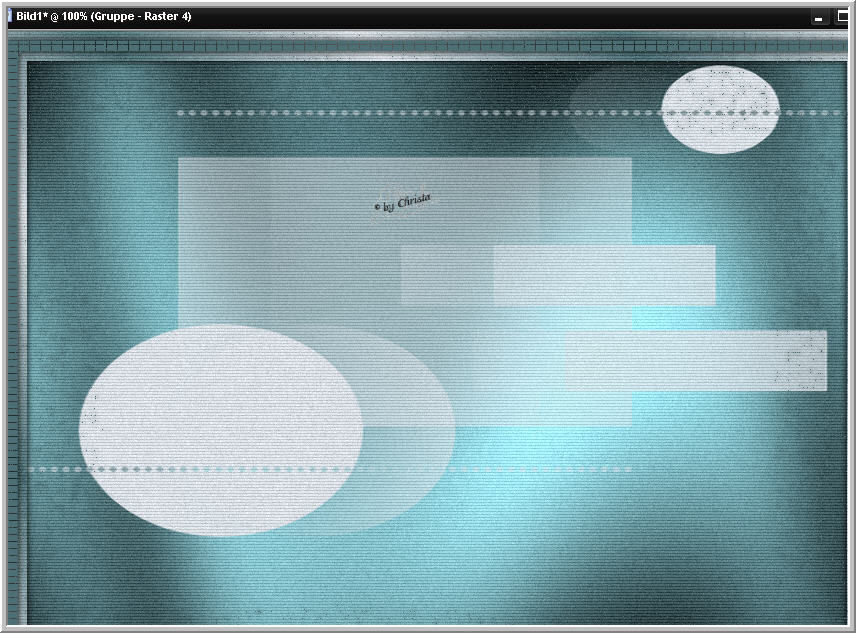
Repeat Photo Effex Scanlines
Step :4
New Raster Layer fill with FG Color
Layer - Load Mask from Disk - merge group

Arrange the mask a little bit to the border - repeat Scanlines
Layer - send Layer down -
Your Mask has to be arranged like this
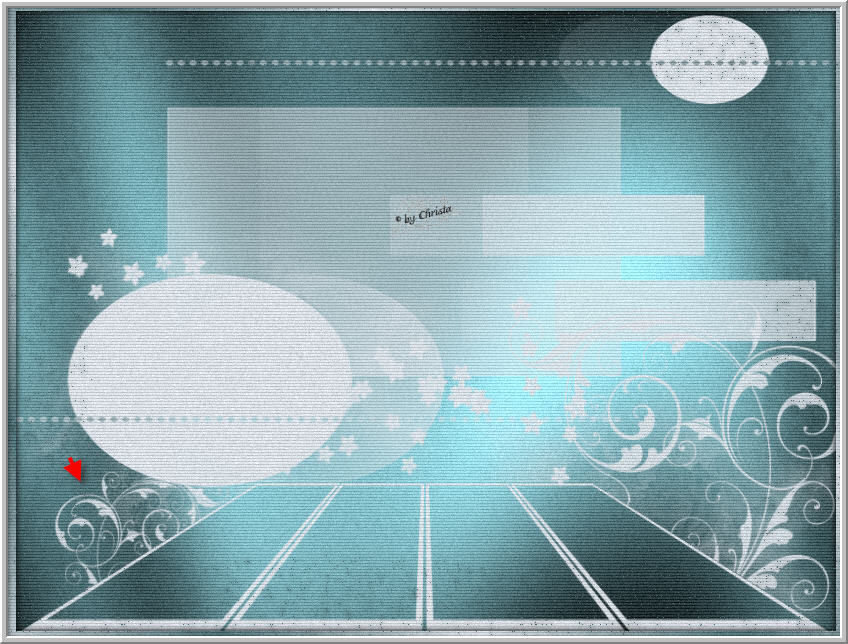
If not you can arrange it later
Step :5
Selection - Load Selection from Disk - activ your first Mask
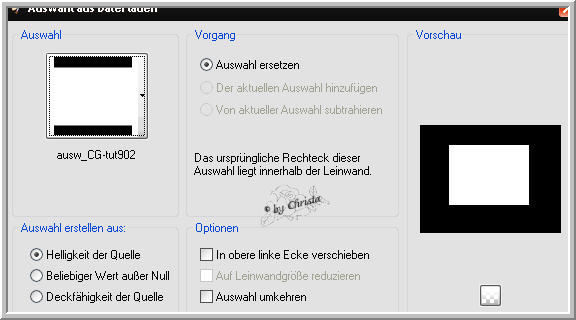
New Rater Layer - fill with FG color - repeat Scanlines
Copy your Tube - mine Leny-misted51.psp - paste as new Layer
Arrange the Tube into your Selection - Selection - Invert -
Delete - Selection - Invert -
I adjust Nik Color Efex Pro 3.1_Cross Balance to the Tube


Layer - merge down
Attention no new Layer !!!!
Selection - Modify - Select a Selectionborder
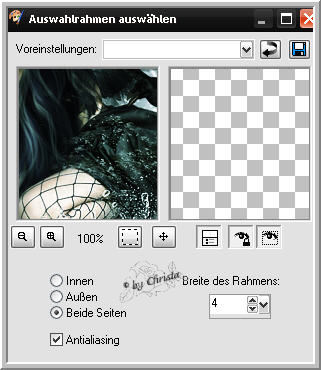
Selection fill with BG color - repeat Scanlines
Effects 3 D Effects - Inner Bevel
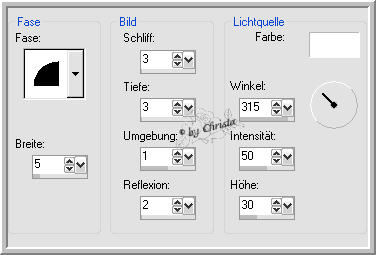
Repeat Drop Shadow as above
Selection - None - Copy - paste as new Image - Image - mirror -
copy - back to your Canvas -
Activ the Mask 2
Step :6
Selection - Load Selection from Disk

If your selection is not alright - move your mask till it fit
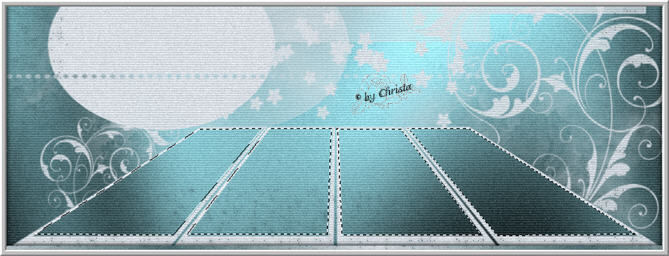
Edit - paste into a selection - your Image is now into the Mask
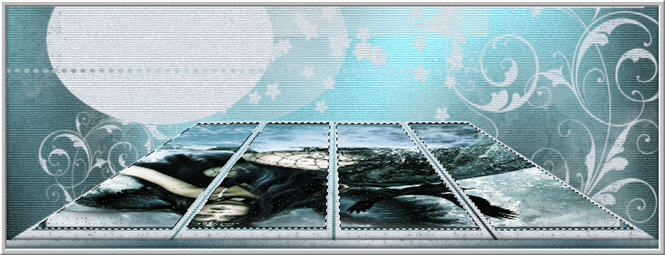
Effects Plugin AlienSkin_Eye Candy 5 Glass_Glass_CG5

PLugin Xero Improver 10/10/10
Selection - none - adjust now this Drop Shadow to both Mask :
1/1/65/8,00 BG color + negativ values
Rename your Layer now like this
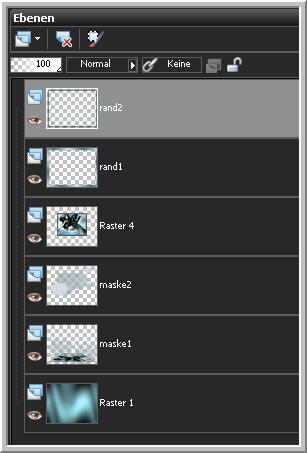
Arrange now the little image now to the Mask 1 as your see at the Screen
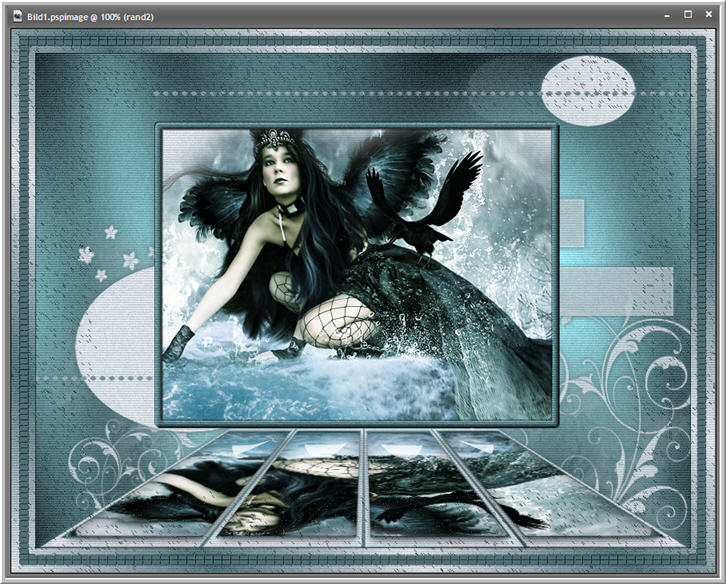
Paste your Text in first place
My Font

Repeat to the Text the last Drop Shadow + Scanlines
Watermark as new Layer
Step :7
Copy your 2. Tube mine DBK AA Model_Xel19.pspimage
paste as new Layer - Image - Resize -
I resize mine to 65 %
Arrange to the right - repeat the last Drop Shadow with black
repeat Xero Improver
I colorize my Tube

Step 8 animation
mask 1 is activ
Copy all Layer - AniShop - paste as new Animation
PSP
Load your Selection again

Repeat Eye Candy 5 Impact Glass - same values
Selection - none
Copy all Layer - aniShop paste after the selected Frame
PSP - Eidt - undo the last step
Repeat Glass with same values - Selection - none
copy all Layer - AniShop - past after the selectied Frame
Seletion - All
Frameproperties to 35
Save as GIF
I hope you enjoyed the tutorial
Sincerely Christa
